

I enjoy crafting. I used to scrapbook before I had two little munchkins running around. Now that my “free” time is dwindling crafting and creativity doesn’t get as much attention as they used to.
At Aroma Outfitters, we’ve had several of you on Instagram post pictures of your wooden boxes, all nicely painted and customized. I was jealous as my box was sitting on my counter still in its original state (don’t get me wrong because let’s face it – it’s pretty nice as is). Nevertheless, improving it and making it “custom” sounded like a fun project.
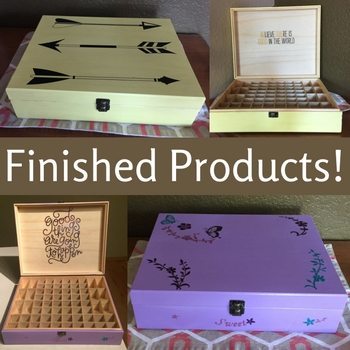
So, after dropping my kiddos off at school, I hit Hobby Lobby (I could spend so much at that place – but this trip I only spent $25) to get some supplies. I wanted to make some pretty custom boxes! I came home and literally with 30 minutes worth of work (there was drying time in there, but the actual “work” part was only 30 minutes) I had two awesome boxes!
Here are some steps I used and can follow if you want to DIY your own custom essential oil storage box.

- Make sure your box is unfinished or has a natural finish. All of our boxes at Aroma Outfitters come with no varnish or coating so they can easily be painted or stained. Some boxes do come with a varnish, so if your box has a coating, you will need to sand it down first.
- Make sure it’s dust/dirt free. Blowing it off with some compressed air will do the trick nicely.
- Lay out some plastic or a painting drop cloth to protect countertops, tables, etc.
- Remove the hinges and latch with a small screwdriver and let the painting begin! I used a sponge type brush and this seemed to work best and not leave any brush marks etc. I also used a basic acrylic paint that can be used for wood surfaces. I purchased my paint at Hobby Lobby, but after looking at Amazon, I could have saved some money with getting one of the paint sets from Amazon.
- After letting the paint dry, I applied some decals/stickers that I purchased. Another great option for some amazing vinyl decals can be found at this Etsy shop.
- After applying the decals, I covered with a clear coat (spray paint type) to seal the paint and decals on.
That was it! Just a few easy steps and I had two awesome custom boxes to store essential oils! If you are the type of person who enjoys decorating for the holidays, it would be easy to paint two or three boxes to match holiday seasons, etc.
Should you decide to get crafty and make a custom box, post it on Instagram with the hashtag #Aromaoutfitters and let us see it!